0016 Lots of painting and sanding
21st March 2020
Trying to get everything ready for painting
 |
| Almost ready for the paint shop ! |
It has been a really busy couple of weeks as I am trying hard to get everything ready for painting. In order to save money and time, I am trying to have everything primed and rubbed down with 600 wet & dry and masked off so that when I move it to the spray painters they spend less time (and money !) having to do the preparation work, and can just get on with the spraying. But I see how the costs of spray painting quickly mount - The painting itself is the easy bit - It is the preparation of the car that takes so long. And there are so many nooks and crannies, as well as the body shell, plus the 8 panels that all need rubbing down - It sometimes seems like an endless task. But I think I am making
good progress !
 |
| New seam sealer added |
First task was to add some more seam sealer. I had noticed some more hidden and crumbling old
sealer both in the footwells, and also inside the rear guards, and once the sealer decays, rust moves in ! . Unfortunately I bought white sealer (again !), but as I had to overpaint it with black anti-rust coat anyway, all was good in the end. Must remember to buy black next time !
 |
| Rubbing down outside |
With the sealer all in, and the rear suspension all complete, Clementine was back on her wheels for the first time in several weeks, so I could push her out into the sunshine and turn her around so I could do some more work on the front of the car. The bonnet had a thin layer of surface rust and paint corrosion, and this had to be all rubbed off. I do this by hand because mechanical tools would raise too much dust which is not acceptable when the garage is part of the house ! Rubbing down, de-greasing, priming, rubbing down again between coats, and meanwhile fixing small dents or rust spots is a stop start business because
 |
| Driver's door |
you are continually waiting for coats of paint to dry. As a result you tend to have 4 or 5 jobs on the go at the same time so you move from one to another as and when they are dry and ready for another coat. The doors were next in line for work, and first of all they needed to be rubbed down, so this was done with them still in place on the car. The passenger door is quite good with no rust holes and only a couple of tiny dents. The driver's door however had several rust holes along the bottom, and also a large vertical dent almost from top to bottom - Looked like the door had been opened into a metal pole, or something. The top part I was able to bog out, but the bottom part was too much for me - The body panel shop would have to do this while they were cutting out the rust spots.
 |
| Removing window winder |
But first I needed to remove the windows - Both the main one, and also the quarter light, and the chrome window surround trim. Originally I had planned to get a 3rd party to do this as I was just not too confidant in my ability to do this. However, no one I spoke to was very confidant of being able to do it either, so in the end I researched it on the internet, and armed with my workshop
 |
| Door glass finally out. |
manual, I started work. As usual, the first time is always the hardest, and I made a few mistakes, but in the end, I got the glass out, the wnder mechanism out, and then the trim and quarter light out. I messed up the trim a little, but as I was able to get hold of some new trim, no harm done. I also took photos of all the rotted door rubbers before I removed them just so I know how the new ones fit after the painting is all complete. Once the window was glass-less, the window surround all de-rusted and primed, and the inside of the door cleaned up, I took it off to GC Restorations who are doing the body work and paint. Very proud of myself for getting this job done - This had really stretched my mechanical ability - Yet again !
 |
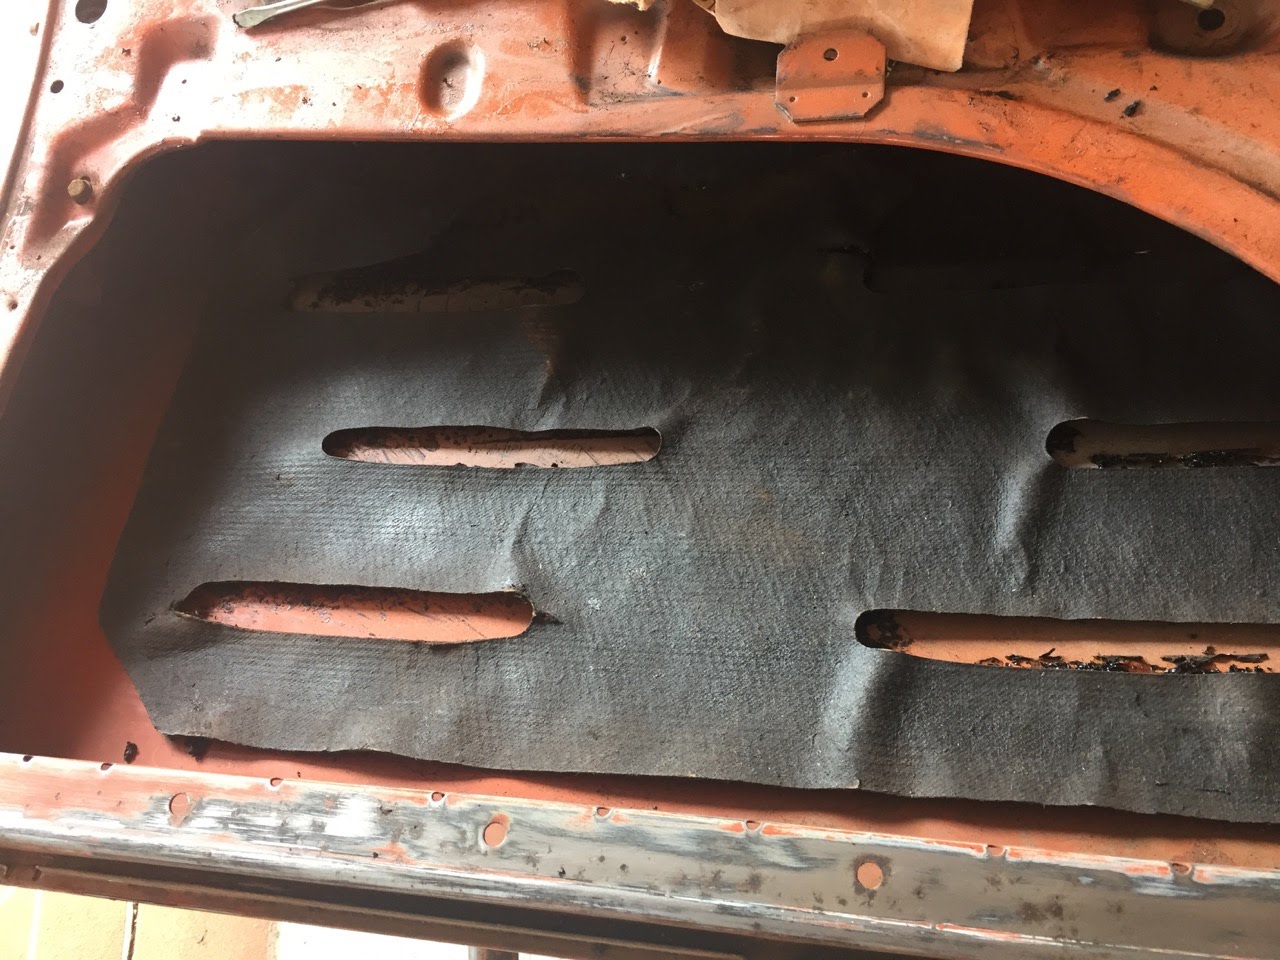
| Old tar paper in door |
I then moved on to the passenger door, and because I knew what to do this time, it all went much more smoothly and quickly. Despite the passenger door itself being in much better condition than the driver's door, the internals were ironically much rustier. But they came out OK, although the window winder mechanism was different, with a spring included in the mechanism. Both VW parts, both with correct item numbers on them (one for left, and one for right), but both very different. Another oddity that no one
 |
| Tar paper removed |
seems to know the answer to. The inside of both doors has a sheet of old thick tar paper stuck on the inside as soundproofing, but being 50 years old it was starting to come away in places, and may well have been the reason why the passenger door window wouldn't wind down. I decided to take it off - I will replace it with modern soundproofing - Dynamat Supreme - Once the car is painted. I already have a large roll of this material to install on the floor of the car, and there is plenty of spare to put in the doors. With the help of a hair dryer, the residual tar was heated enough to enable me to scrape it off fairly easily. I will have to do the driver's door later as it is at the panel beaters now !
 |
| New & old window winder clips |
The window winder clips on the bottom of the window glass were very rusty, but fortunately replacements are readily available, so once the old units were knocked of the glass using a piece of wood and rubber mallet, and the wndow was cleaned, they could be fitted up ready for re-installing. Meanwhile, once the seam sealer was dry, I used my black anti-rust paint on the inner rear guards, so now the only main part left to be de-rusted and painted is the underneath of the floor. This will be easier and quicker to do when I can get the car up on a hoist, so I am leaving it to almost last, but the floor is actually in very good condition, so I am not overly concerned about this item - Just a mucky job !
 |
| De-rusting rear seat frame |
The body panels all need to be rubbed down with 600 wet and dry in preparation for the spray painting, so I have been working my way though all 4 guards in between other jobs. I made a bit of a logistical mistake in that I had ordered all the foam to replace the cocumnt husk padding of the original seats, and started to get all the seats out ready to take to the trimmer - But I couldn't find the seat covers themselves anywhere. I looked everywhere - on all the shelves, in the garden shed, in my office, in cupboards, under the bed - Nowhere. Suddenly I realised that although I had ordered them, they hadn't been delivered yet ! I checked with the local supplier and we eventually determined that they are on a
 |
| Working on a front seat |
ship, 4 weeks away ! Further investigation revealed that the parts coming were for high back seats - Mine are low back ! As a result, I have now ordered the correct style direct from the supplier, and they should be here in a couple of weeks. But this gave me the time to de rust the frame of the rear seat, and to prime and top coat the base of one of the front seats, which I had not done earlier. So in the end, time well spent. Just out of interest, I did try to clean up one of the seats, and it actually came up OK - Trouble was that the sides of the seats had all gone brittle in the heat and sun, and were cracking, so they really needed recovering anyway. Additionally I have to remove all the old coconut fibre cushioning used because itis not only crumbling and falling apart, but has all got wet in the past and is very musty.
 |
| Fox Friday beer in Brisbane |
We then had a brief interlude from the VW because son-in-law Benn was coming up for a weekend. He had sent some kegs of his delicious Fox Friday beers up from Tasmania by road, and he and several other Tasmanian craft breweries were having a "tap
 |
| Enjoying the beer ! |
takeover" at a pub in Brisbane, as a means of getting wider publicity for their beers. So on Saturday we went to a couple of craft breweries on the Gold Coast with Benn, before going up to Brisbane on Sunday, meeting Amy and her friend Saeran up there, and having some great buffalo wings for lunch, while having a couple of Fox Friday brews ! One of Benn's beers is a Triple Double IPA with a 9.8% abv !! You can only have one of these ! Anyway, a very pleasant afternoon out, great success for Benn's beers, and I look forward to their cans hitting the market soon so we can get some up here on a regular basis !
 |
| Primer on the dashboard |
Then it was back to work ! To the dashboard, which was very sad and sorry. The upper plastic dashboard was totally destroyed by the sunshine and age, but I had managed to find someone on S Africa that still makes reproduction ones. Lots in America, and much cheaper, but all for LHD cars !! So this new upper section can be fitted once the car is painted and the windscreen is back in. But the lower half of the dash is just bare metal in car colour, and the old dash had been mistreated so not only was it faded but
 |
| All clementine again ! |
also very pitted and scratched and generally damaged. I don't really want the painters
 |
| Glove box & ash tray painted |
to paint anything inside the car, so I decided to paint this myself using spray cans which I had specially made up just for this kind of job. I masked off the underneath and the glove box (using old file covers !), and taped up the steering column, and after rubbing everything down to eliminate the scratches, sprayed it with a couple of coats of primer. Once this was dry and sanded with 600 grit, I added a couple of top coats of Clementine. Also had to do the ash tray and the glove box door. After it was dry, and the masking removed, I was well pleased with the result - Looks just like new !!
 |
| Cardboard template |
Still fighting the wiring and fuses - I really wanted to fit a more modern fuse box with blade fuses, and had tried to fit them under the dash on the firewall, but it just wasn't working out - Very untidy and unsightly. As usual, my mind works best while I am
 |
| Transferred to metal |
asleep, and I awoke one morning with a brainwave. I would fabricate a base plate that would allow the new fuse boxes to fit through the plate, so that the fuses were on the lower surface (and therefore easily accessible) while all the wires would be on the upper side, hidden from view, almost identical to the original. After a cardboard template was made to test my theory, a visit to Bunnings got me a small sheet of suitable metal and I transferred
 |
| Finished article |
my ideas on to it. Careful cutting and measuring soon had it made up and working as planned, so it was primed and top coated in black. I then glued some leatherette trim cloth on the upper side so that and wires which touched the base would not short out. All done, and just needs to be fitted to the car and the wiring all tidied up.
 |
| Outside for sanding |
While the fuse plate was being painted, I moved Clementine
outside in order to rub all the panels down with 600 wet & dry, in final preparation for moving it to the painter. As this is quite a messy operation, I wanted to do it outside where I could hose everything down afterwards. I had to remove the bonnet because the painter wants it off for painting, and had to get Janet and her niece Amy to help me - And within 5 minutes it was off, so I could then remove the rest of the very perished rubber seal, and rub down and prime the groove where the new seal will fit. This was soon all done, and I moved on to the bonnet itself. Unfortunately it has to very visible dents in it, where someone has sat on it, or similar. I was unable to fix it, and unless the body shop is able to do it easily, then the dents will have to stay - Patina !!
 |
| Panels stcked in the garage |
Hopefully I can get the car and all the panels across to the painter this week, because storing them all in my garage is a real problem - I keep having to move them and inevitable they keep getting small scratches, which then have to be fixed ! In the meantime I have lots of small jobs to keep doing. The rear boot plinth which holds the number plate light has a
 |
| Re"chromed" rear light |
ribbed chrome cover, and this was quite badly pitted. Before I spend any money chroming this part, I thought I would have a go myself. First observation is how hard chrome is ! The pitting was quite severe, and trying to rub it down took a big toll on my fingers - I eventually had to resort to the dremel and even a file to get rid of the unsightly blemishes. Once done, I had a go with some "chrome" spary paint, and it turned out really well ! Certainly good enough to get the car rolling, and if I don't like it later, it can be easily removed and re-chromed.
Lots of things to be done, but first issue is to get the car to the painters. Hopefully this week. Exciting as it marks a major stage in the rebuild !
Rest of the pics are here :-
https://photos.app.goo.gl/FYZ2TBu7JddnPHUt9


No comments:
Post a Comment